Welcome to eWinetag! We’re thrilled to have you on board. Get ready to create stunning and informative e-labels—easily and efficiently!
Table of Contents
Creating your First E-Label
Create your first label – let’s walk you through the essentials.
You can choose language of your choice from the right top corner language drop down menu. This drop down menu is scrollable and consist of 26 languages to choose from.
Step 1: Log in to Your Ewinetag Account
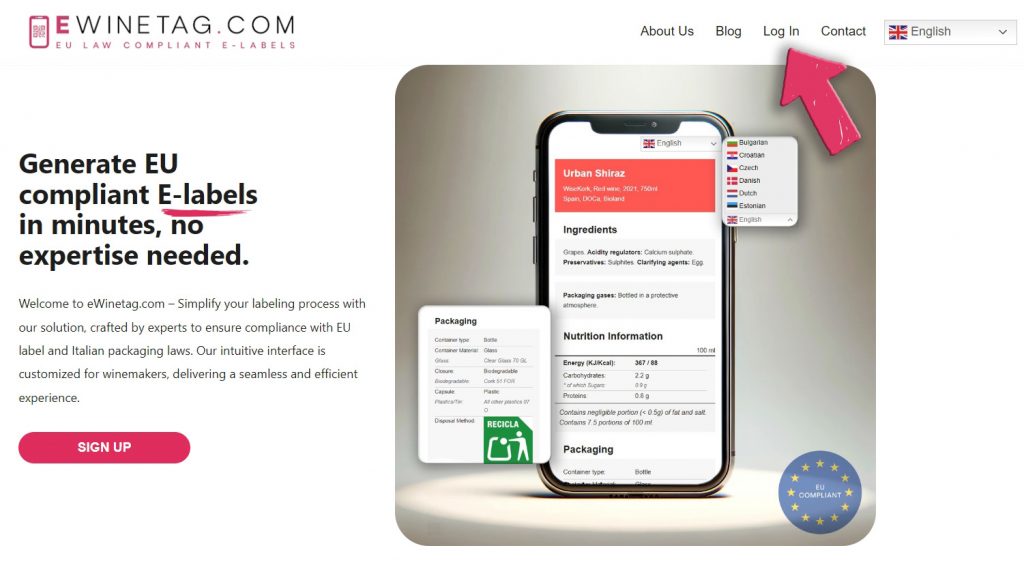
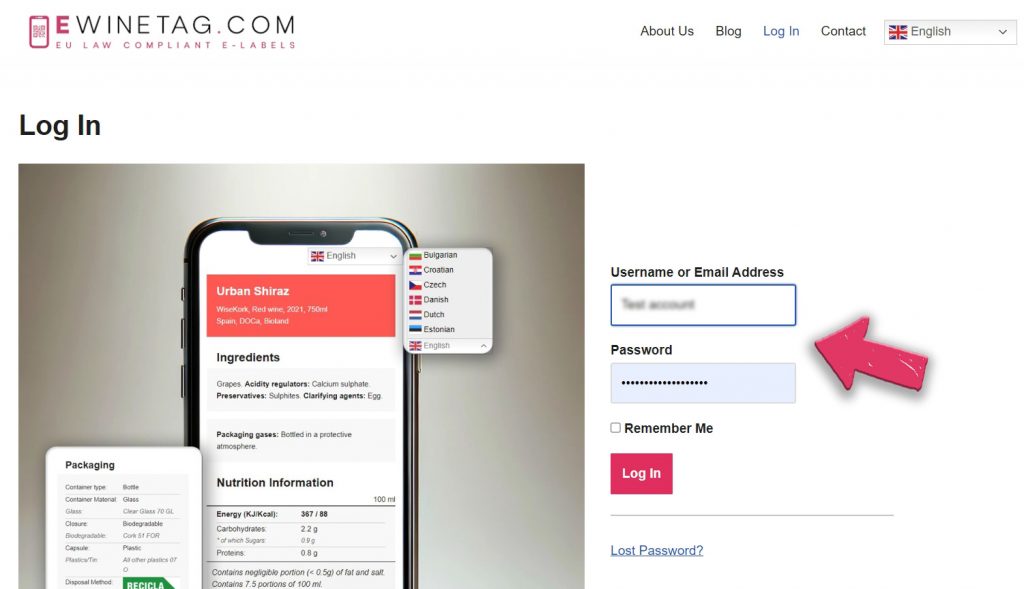
Add Your Username and Password
Ready to create your first e-label? Log in using your registered email and password to access your eWinetag account. This will grant you access to our comprehensive e-label creation tools and features.
If you haven’t set up an account yet, please visit the subscription page to start creating your labels.
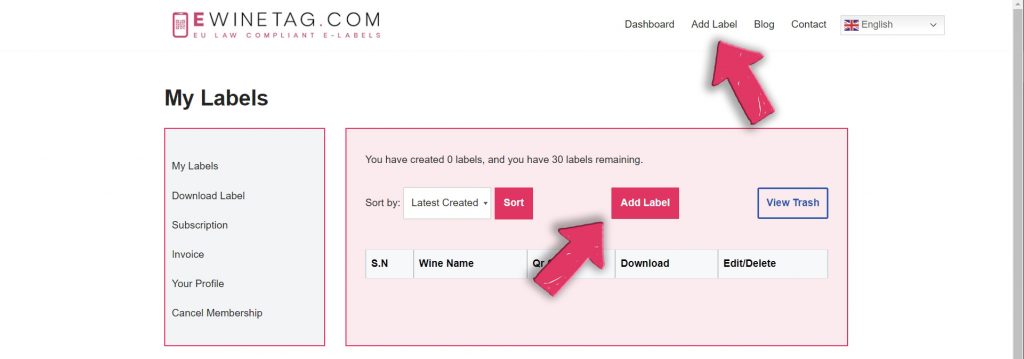
Log in and voila! Your e-label dashboard awaits. Create, view, and manage all your labels from here.
Step 2: Add Label
Add Label
Get started by clicking the “Add Label” button. It is located in the top right corner and also on your main dashboard (see image below for reference).
Fill up Information
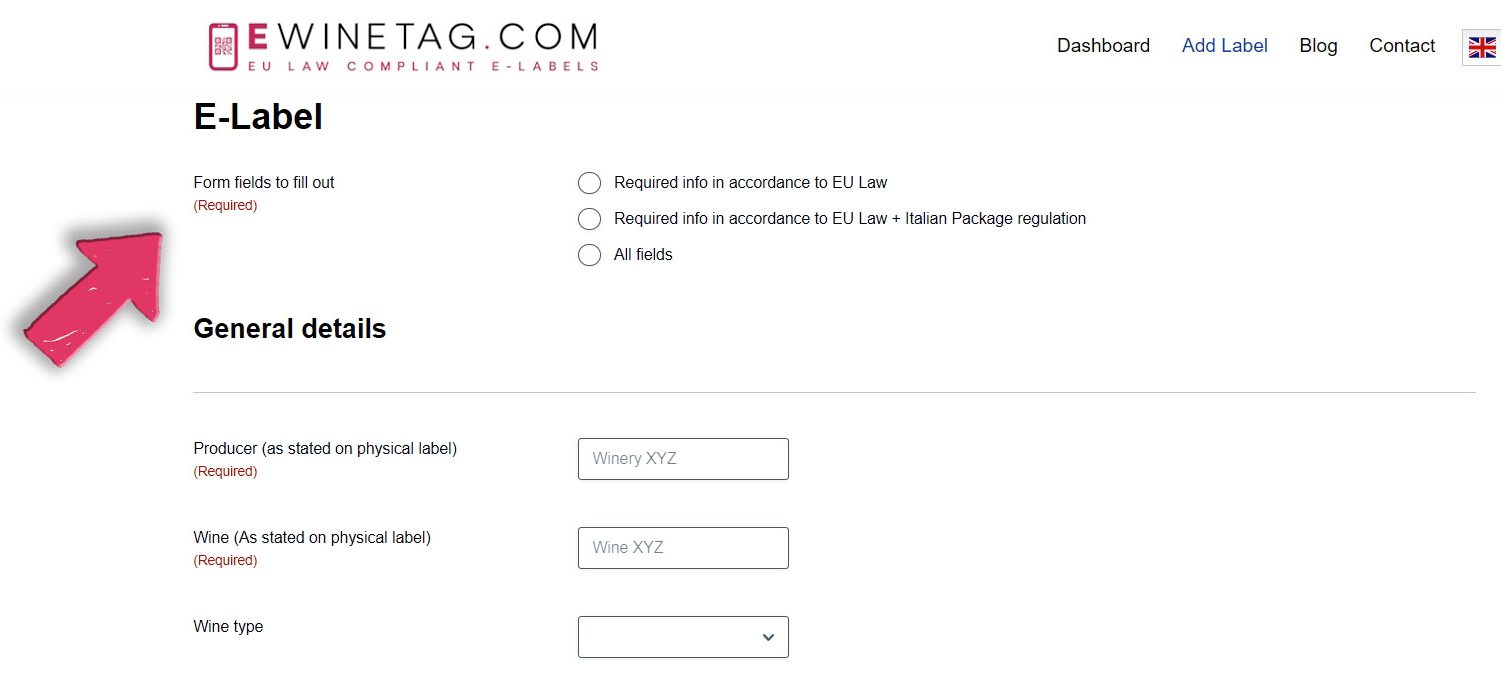
Select your compliance level. Are you selling within the EU only, or do you need to comply with both EU and Italian packaging regulations? eWinetag makes it easy to choose the right option based on your target market. Fill out the mandatory fields marked “required” highlighted in red. These ensure your e-label meets all legal requirements for your chosen compliance level. Select “All Fields” to fill out the entire form to showcase additional details about your wine and connect with your customers on a deeper level.
Fill Out the Necessary details in a Flash
Creating compliant e-labels doesn’t have to be complicated. We’ve highlighted the mandatory fields in the images below. Focus on these key details, and eWinetag will ensure your label meets all necessary regulations. It’s a quick and easy process that keeps you on track!
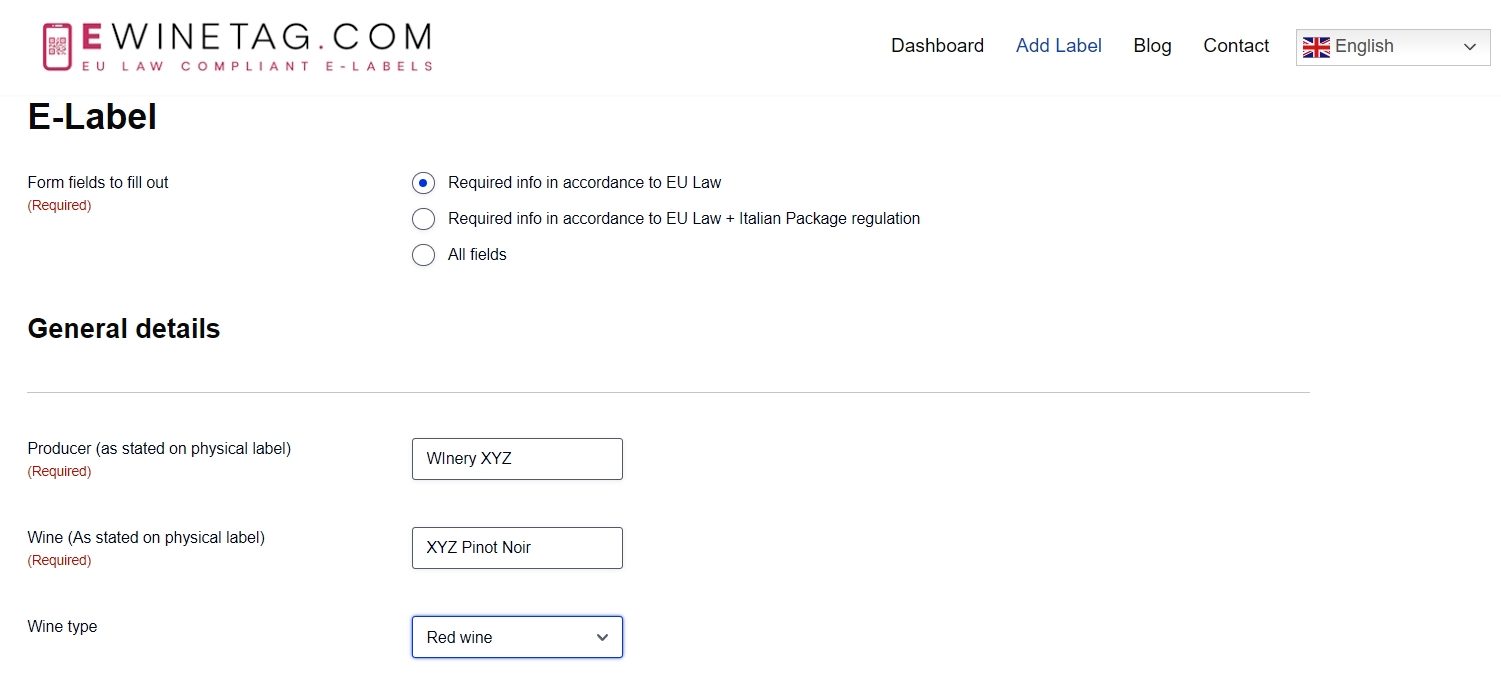
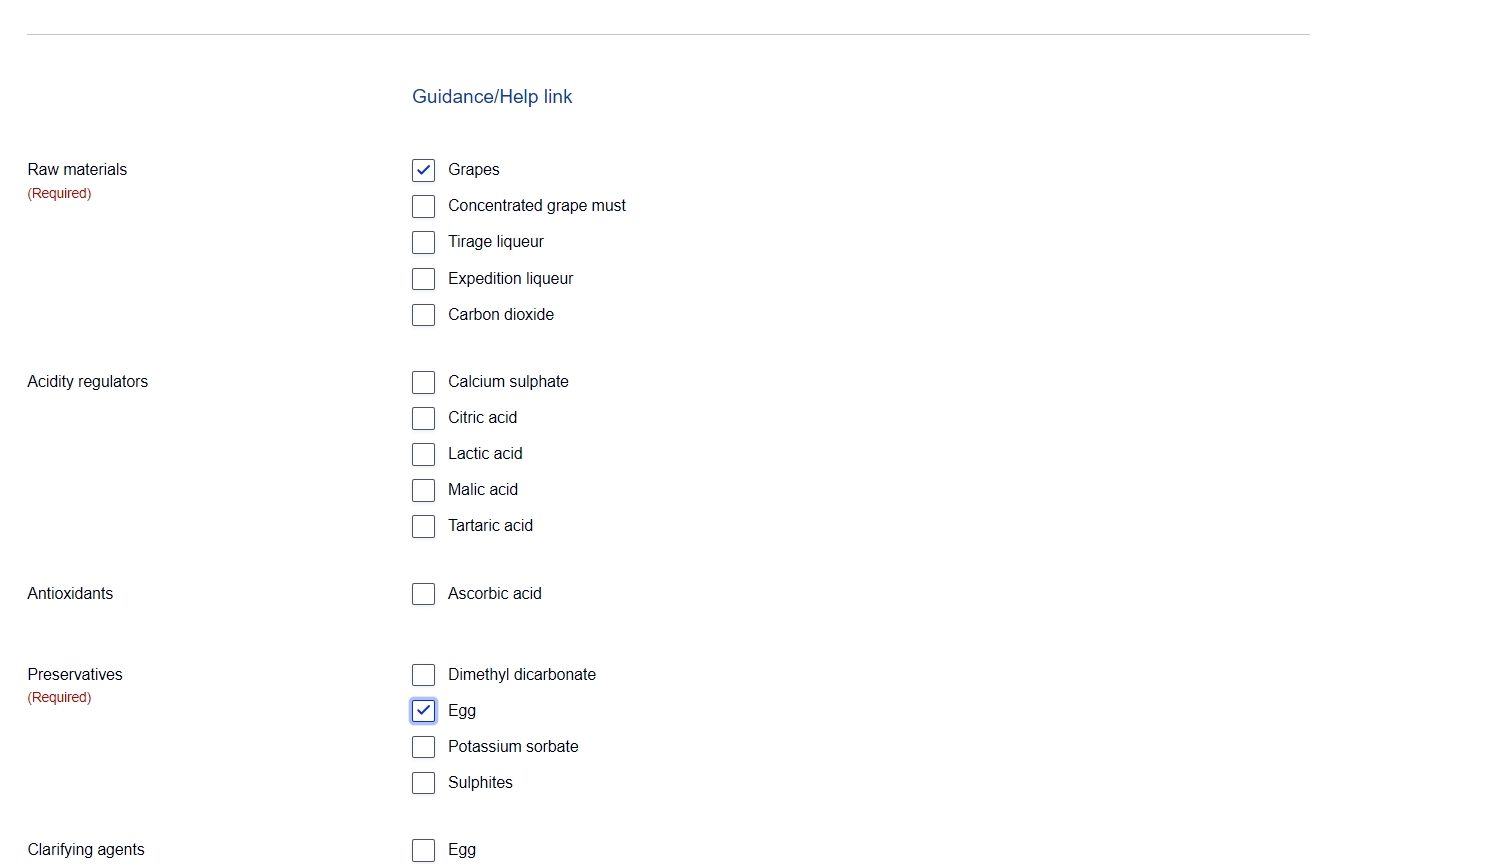
Streamline the process with eWinetag’s automated energy value calculation. Simply select your wine type, and our system will pre-fill this section of your e-label based on established average values for glycerol and acidity. This ensures your labels are accurate and compliant with labelling standards, saving you valuable time and minimizing the risk of errors.
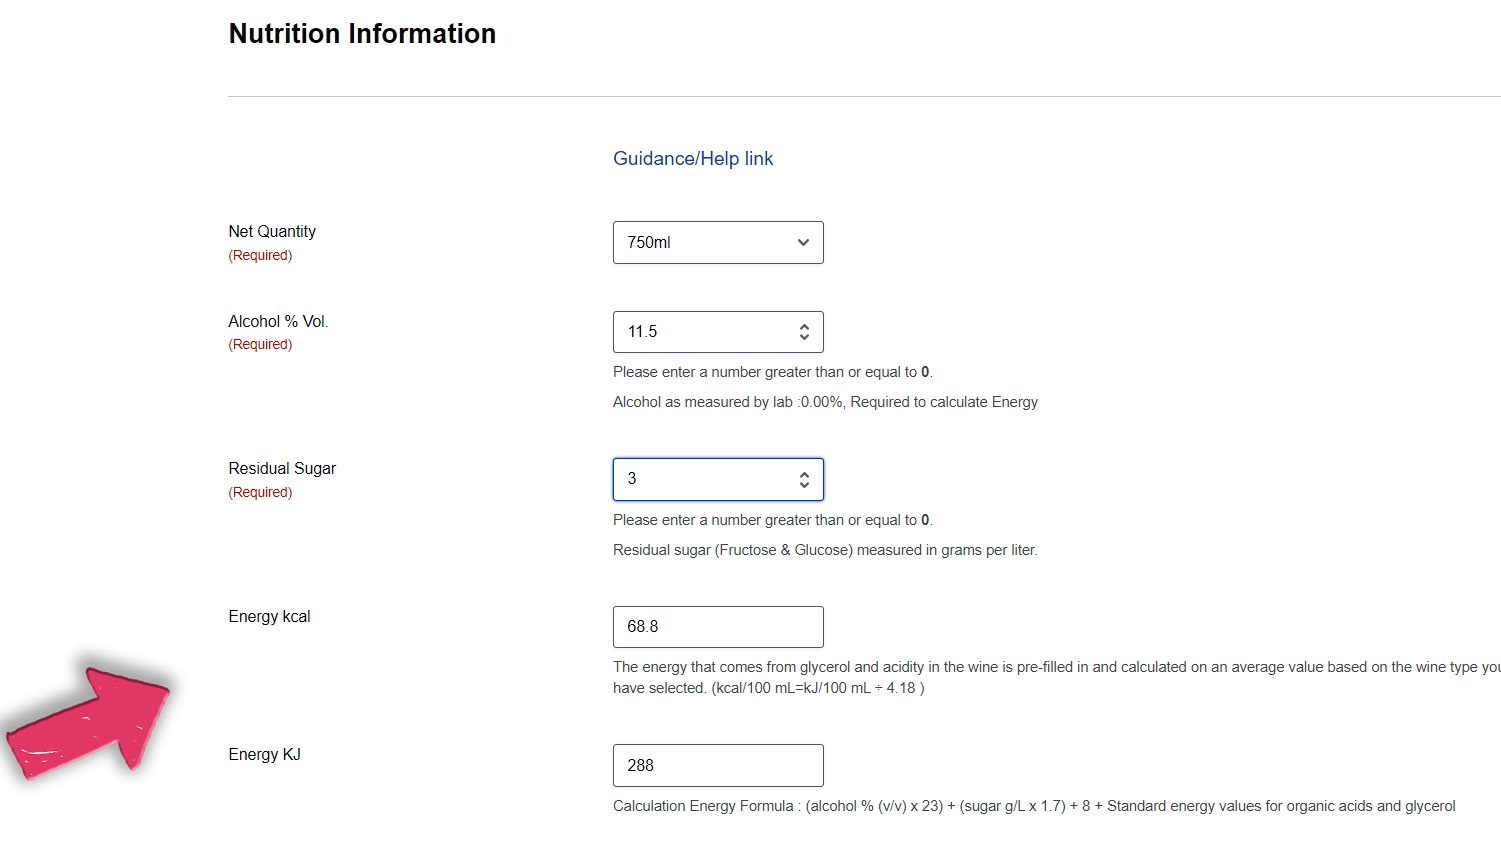
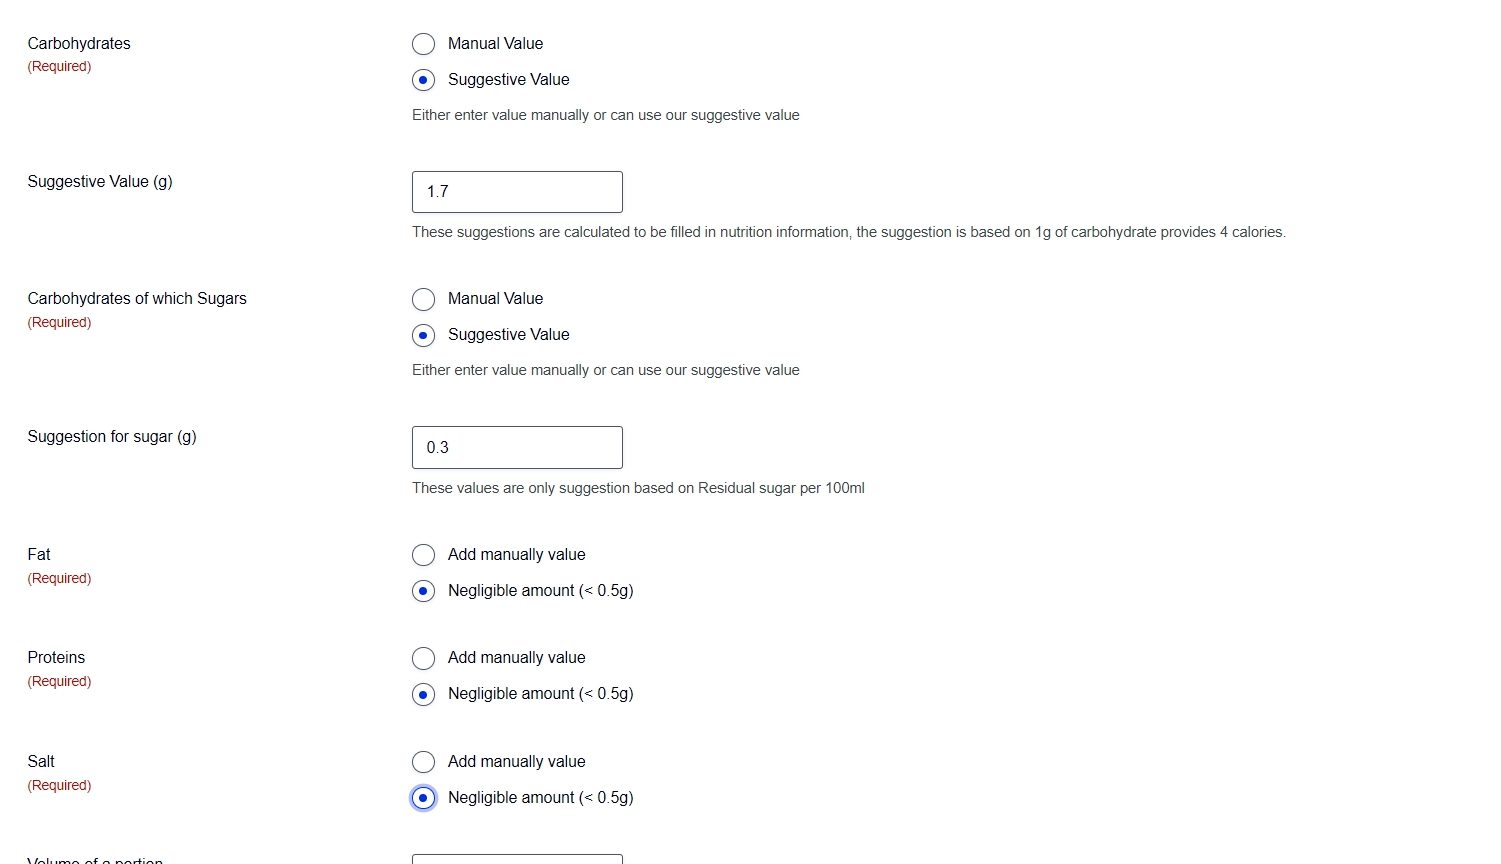
eWinetag simplifies the process of including nutritional information on your e-labels. We offer two options to ensure accuracy and compliance:
Manual Values: For lab-analysed nutritional data, you can directly input specific values for carbohydrates and carbohydrates from sugars.
Suggestive Values: For your convenience, eWinetag provides suggested average values based on the selected wine type. This can serve as a starting point, and you can adjust these values if needed based on your specific analysis.
For Fat, Salt, and Proteins, if the amount is below 0.5g per serving, a simple selection of “Negligible amount (<0.5g)” is available. This will automatically display on your e-label as “Contains negligible portion (<0.5g) of Fat, Salt, and Proteins” within the Nutrition Information section.
This streamlined approach empowers you to create compliant e-labels efficiently, while maintaining control over the accuracy of the nutritional information presented.
Once you’ve filled in everything, just click the big blue “Create My E-Label” button to finish.

Congratulations! You have just created your first e-label.
After creating your label, you will be redirected to a page where you can either add a new label or manage your previously created labels.
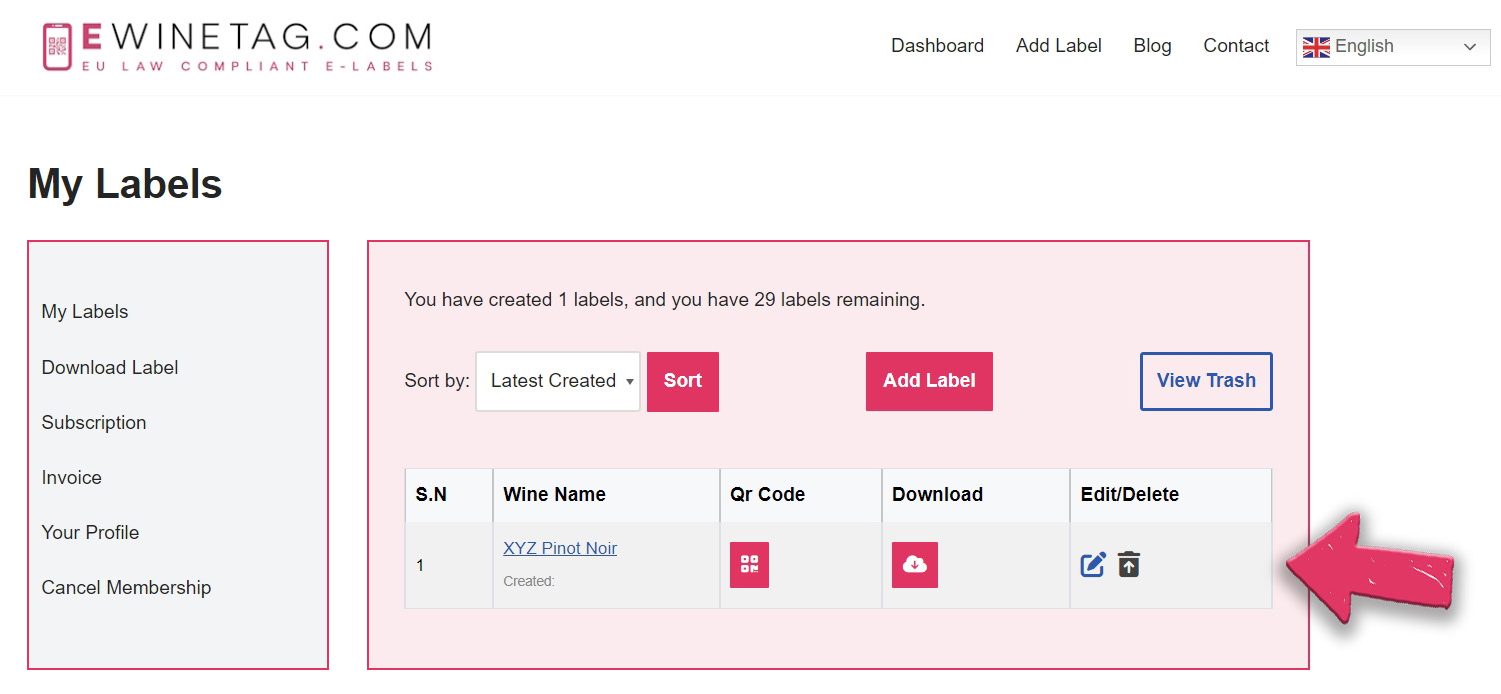
Dashboard Overview
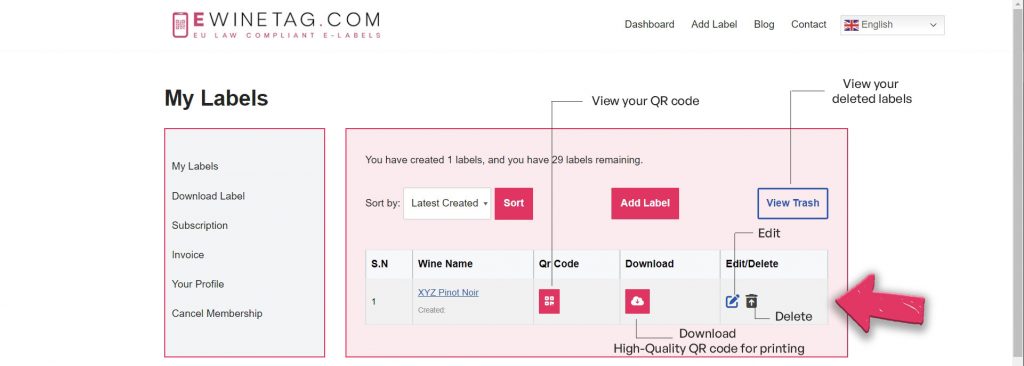
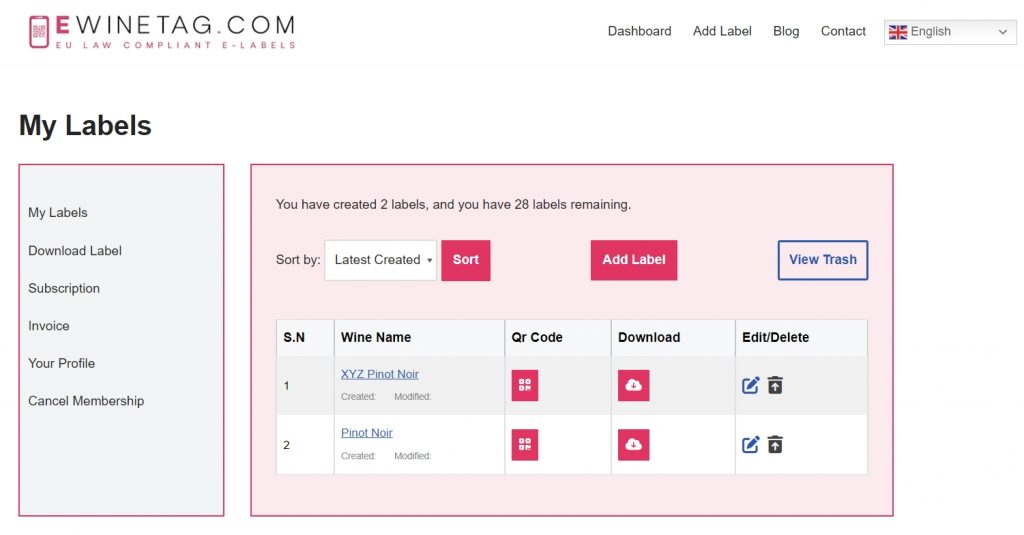
The “My Labels” dashboard serves as your central hub for efficient e-label management. This comprehensive interface empowers you to:
- Review Label Details: Access a clear and detailed view of your created e-label, ensuring all information is accurate and visually appealing.
- Generate High-Resolution QR Codes: Seamlessly integrate your e-labels with physical packaging by downloading high-quality QR codes. These codes ensure readability and optimal functionality.
- Maintain Label Accuracy: Maintain the accuracy of your e-labels over time. The editing functionality allows for effortless updates whenever necessary. Simply modify your label information and regenerate the QR code for continued effectiveness.
Deleting Label
To delete a label, click on the bin icon. Once deleted, the label will move to the trash section in the dashboard. It will be inactive but not permanently removed, allowing you to restore it if necessary. This feature ensures that no label is deleted by mistake.
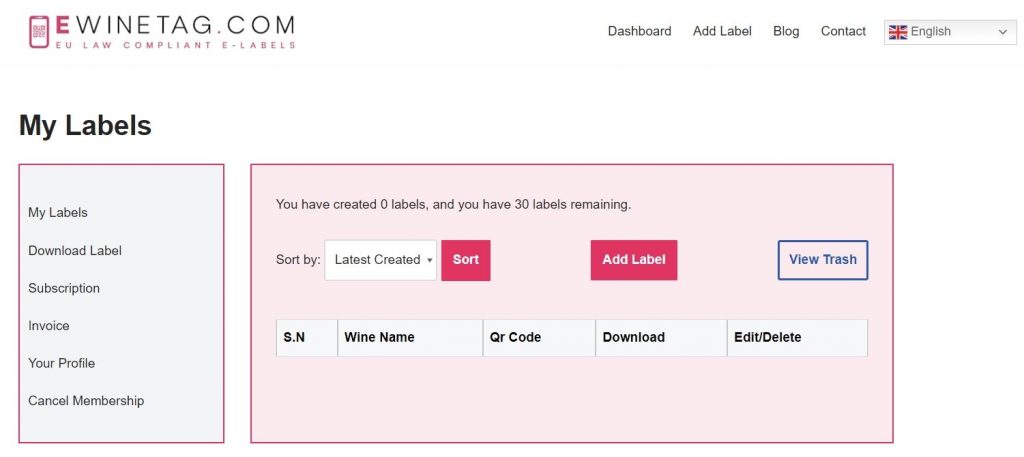
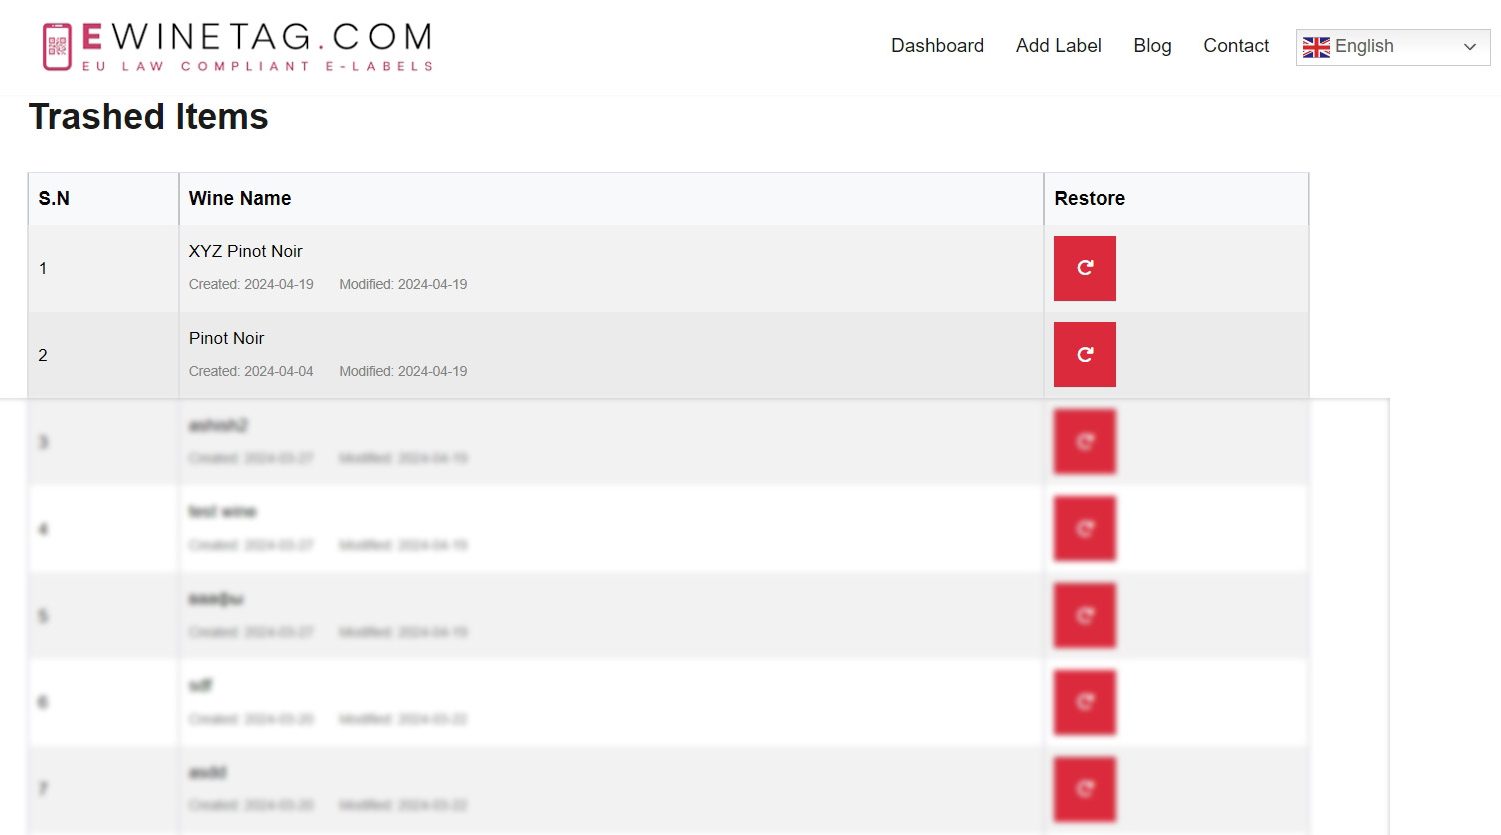
Restoring Deleted Labels from Trash
To access trashed items, click on the “View Trash” button located in the top right corner of the dashboard. This will redirect you to a page displaying all deleted labels. In the image below, you’ll see several deleted labels. To restore any of them, simply click on the “Restore” button on the label. For example, I restored the two labels that are listed at the top of the trash section by clicking on the “Restore” button next to each of them. This action will return the labels to your active My Label dashboard where they can be edited or used as needed.
Now, when you return to the “My Label” dashboard, you should be able to see the two labels that you restored. They will appear among your active labels, ready for any further editing or use you might need.
How to Sort Labels
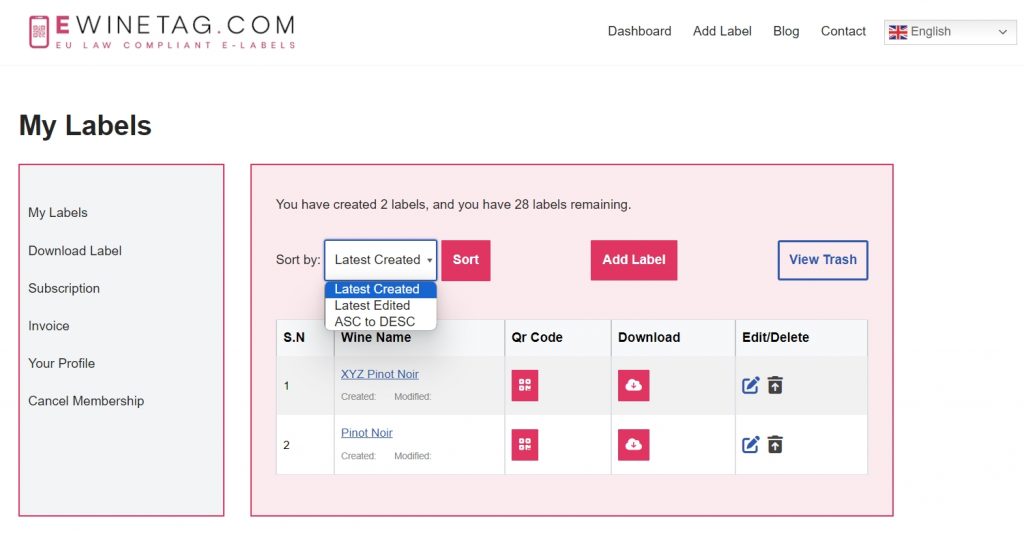
If you have many labels, you can easily organize them by clicking on the sort button. This allows you to sort the labels by latest created, latest edited, or alphabetically from A to Z, helping you quickly find the label you need.
Editing Labels
To edit a label, click on the “Edit” button associated with the label you wish to modify. This action will redirect you to a form similar to the one used initially for creating the label. You will need to fill in all the values again, making changes to any fields where edits are necessary. For example, if you previously selected “Negligible amount” for Fat, you can now change it to a manual value.
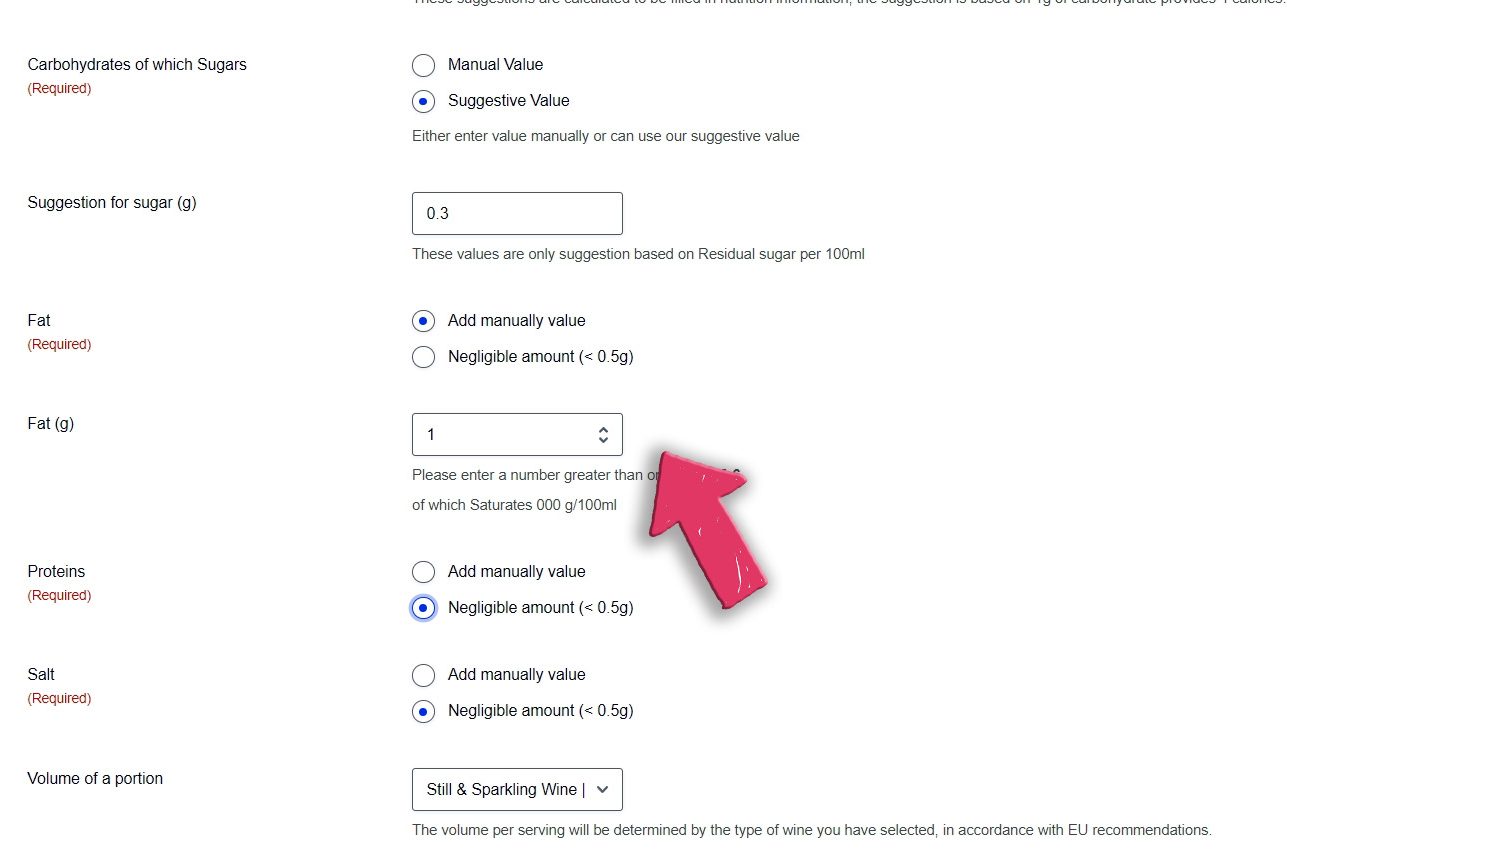
After you have updated the form with the required information, click on “Create my E-label” at the bottom of the form. This will overwrite the previous values, but the QR code and the URL to the e-label will remain the same as before, ensuring a seamless update without altering how users access the label.